
Prologue
I became a permanent resident of Canada on December 22, 2024, after working in India for 6 years, nailing my CELPIP/IELTS with CLB 10, and completing two degrees! If you have been following the news, immigration has become extremely difficult, and those already in the country with a work permit or an education are unable to qualify for PR because there’s a cap in place; the scores are just too high. I got lucky, at the right time, and my occupation is/was in demand. More on my decision to move from Bangalore, India into a deep freezer — in a later blog post.
So, after activating my PR status, I came back to India and started planning my move. In the interim, I needed a phone number. I initially signed up with Chatr but moved over to voip.ms to retain my Canadian cell phone number for the time I would be in India. 😎
So, for the terrific price of USD 0.85 a month, I retained my phone number, calls are priced at barely one cent per minute to US/Canada. I have the ability to receive/send SMS as well. It works so well that if you want a landline (yes, in 2025!) and want to skip the middleman (your mobile network operator) — you can plug in a hardware landline phone with IP functionality (like a Grandstream ). My requirement is to receive phone calls on my iPhone; however, hence, I use a Softphone - this works as long as you have Internet connectivity (i.e., mobile data). I like trying out something new every now and then.
Register and setup an account
- Go to VoIP.ms and click on Sign Up.
- Fill in your details and complete the registration process. Most of the time, you’ll need to provide a photo ID to complete your sign-up. I provided my Canadian ID because they cancelled my sign-up when I provided them with my Indian ID (probably because they thought I was going to use their service to impersonate tech support and tell people they have a virus on their computer lol 😭)
- Finances > Add Funds (minimum top-up of $15)
- Go to DID Numbers > Order DID(s) > Canada (or country of your choice) > Ontario > anything other than Brampton > select the billing plan (per minute) > POP (point of presence) - very important that you select something physically close to your location to get the best latency (I chose London) > Confirm
- You can buy multiple numbers if you create a sub-account, but I’ll just stick with “Main”.
- At this point, you should get a confirmation email. You can go to Manage DID(s) and enable SMS if you wish (and forward it to your email).
- Go to the Main Menu > Account Settings > General > Caller ID > Set the Caller ID to the number you just leased. Go to Security tab > Main SIP/IAX Password > Set Random Password.
- Go to Advanced > Set NAT to Yes and Max Expiry to 3600 seconds.
Now, we need a Softphone — this is an app that allows us to use the SIP account we just configured above. You may go to this link and check out the options available. TL;DR, For Android, the official app by voip.ms is available. But since I’m a generous payer of Apple tax, I’d prefer to use Groundwire or Sessiontalk . You’ll need to use an app that supports server-side push notifications (and that ain’t free) because mobile phones cannot maintain a consistent connection to the POP we selected above. If you are OK with missing incoming calls and only need this for outgoing calls, you’re good to use the free version of Sessiontalk or Bria Mobile.
Configure Softphone and test that your calls go through
Once you have downloaded the Softphone app of your choice, you have to configure it. I can’t list the instructions separately for every app but generally, the configuration is simple to do:
- Add New Account and select SIP:
Username: You’d have received this in your email (SIP/IAX Main Username)Password: The random password that you also got in your emailDomain: POP that you selected in the setup above (London for me)
- Save and connect. Play around in the app settings and make sure to enable push notifications (this would be a paid feature for the reasons explained above unless using the free app on Android).
- Place a test call to a toll-free number in Canada. You can test incoming too by signing up for WhatsApp or checking your email for inbound SMS to test messaging.
Your homepage on voip.ms’ website should look like below, and you should see a green “Registered”.
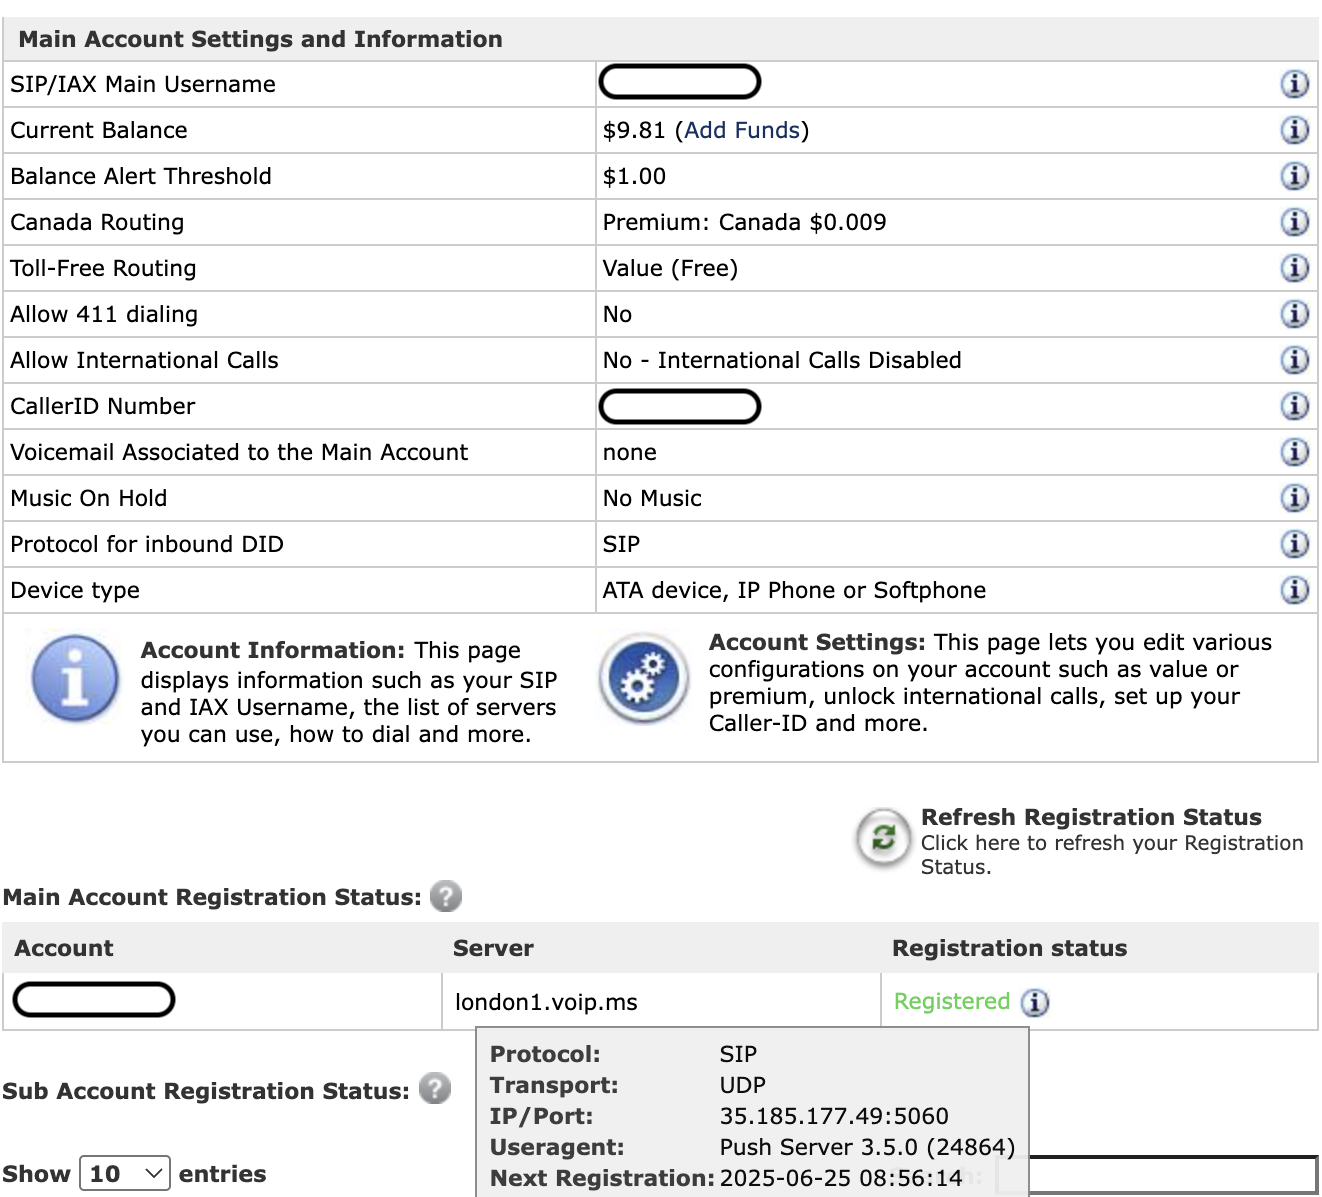
Home Page on voip.ms
How it works
The phone number that you’re using belongs to voip.ms. The inbound call is routed through the public PSTN network by the origin MNO and lands at the POP (London) that you chose. The server routes it to your device. The call follows the reverse path for outbound calls and ultimately ends up with your intended recipient.
Congratulations, you’re all set! You cut out your middleman (MNO) for your secondary number and swapped it for a reliable, high-quality SIP provider.
You can now experiment with the Account Settings and can verify your existing caller ID. This means that you can call your contacts in your home country over internet when you’re overseas without incurring international roaming charges, as the call placed on the SIP account won’t be routed through your network operator 🙂
Optional and to do:
- Encrypt SIP Traffic under Account Settings > Advanced. This will encrypt your signalling protocol with TLS and your audio stream with SRTP. You’ll need to make appropriate changes in the Softphone app as well. I have decided to leave it off, I use a VPN on public networks anyway, so nobody can spy on my medical condition called Witzelsucht 😇
- Port over to a physical network provider in the future so I can have mobile data on the go once this becomes my primary number.
- Profit?!